
Here's a guide on how to do the following:
1. Create Users
2. Create Groups
3. Create roles and assign permissions
4. What is One Stop Account Root User?
Create Users
Step 1: Click the "Users" button on the left column and go to the "users" page (shown in Figure 9 - User page).
Step 2: Create a new user.
-
Click the "Create user" button and open the "create new user" page.
-
Enter the user information, and select the team and role on this page. The screen appears in Figure 10 - Create new user detail
- Click the "Create" button, and the user will be created
Create Groups
Step 1: Click the "Groups" button on the left column and go to the "Group" page. The screen appears as "managing groups".
Step 2: Click the "Create group" button on the top right corner of the middle column of the page.
Step 3: After clicking "New group" button, open the "add new group" pop-up window. Enter a group name and it cannot exceed 20 words. The screen appears as "Figure 8 - the pop-up window for adding a new group".
Step 4: Click the "Create" button, and the group will be created.
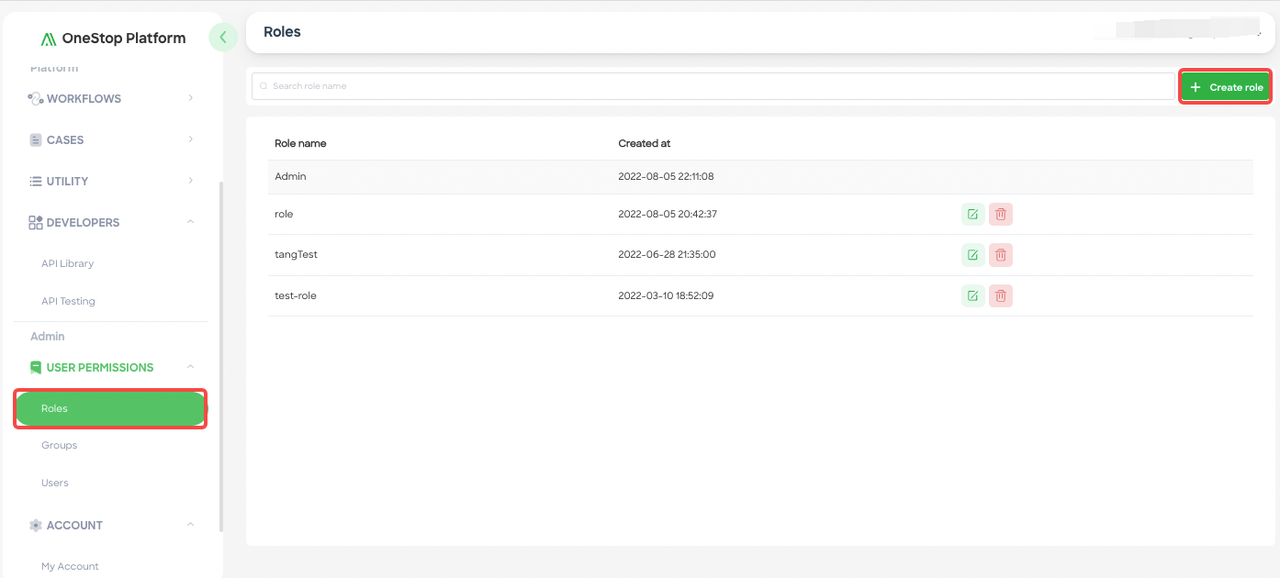
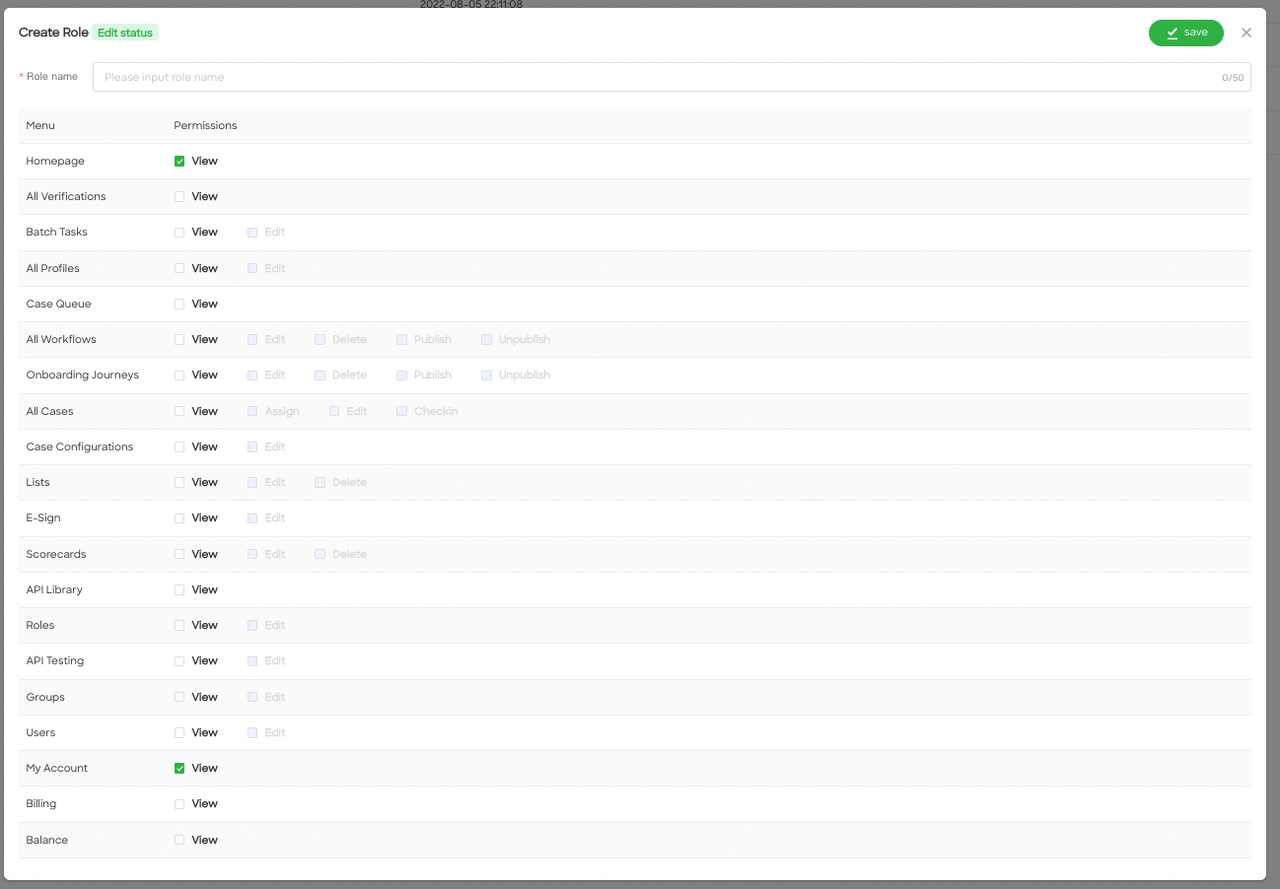
Create Roles and Assign Permissions
Step 1: Click the "Roles" button on the left column and go to the "Roles" page. The screen appears as "managing role".
Step 2: Click"Create role" button on the top right corner of the middle column of the page.
Step 3: Enter the role name and assign operation permissions for the role. The permission description is below:
-
The menu column represents the different function modules on the One Stop Platform.
-
The permissions column represents the different operation permissions.
-
The "View" permission allows users to view pages.
-
The "Edit" permission allows users to edit. For instance, the "Edit" Permission on the Cases page allows users to review cases.
-
The other permissions such as "Check In", "Delete", "Publish", and "Unpublish" allow you to use the corresponding button functions on the page. For instance, the "Check in" Permission on Cases page allows users to click the "Check in " button to check in cases。
Step 4: Click the "Save" button to upload and save the permission setting.
What is One Stop Account Root User?
When you first create a One Stop account, you begin with one identity that has complete access to all OSP services and resources in the account, which is not subject to account operation permissions configuration. This identity is called the One Stop account root user. You can sign in as the root user using the email address and password that you used to create the account.
We strongly recommend that you do not use the root user for your everyday tasks, even the administrative ones. Instead, adhere to the best practice of using the root user only to create your first user. Then securely lock away the root user credentials and use them to perform only a few account and service management tasks.
Comments
0 comments